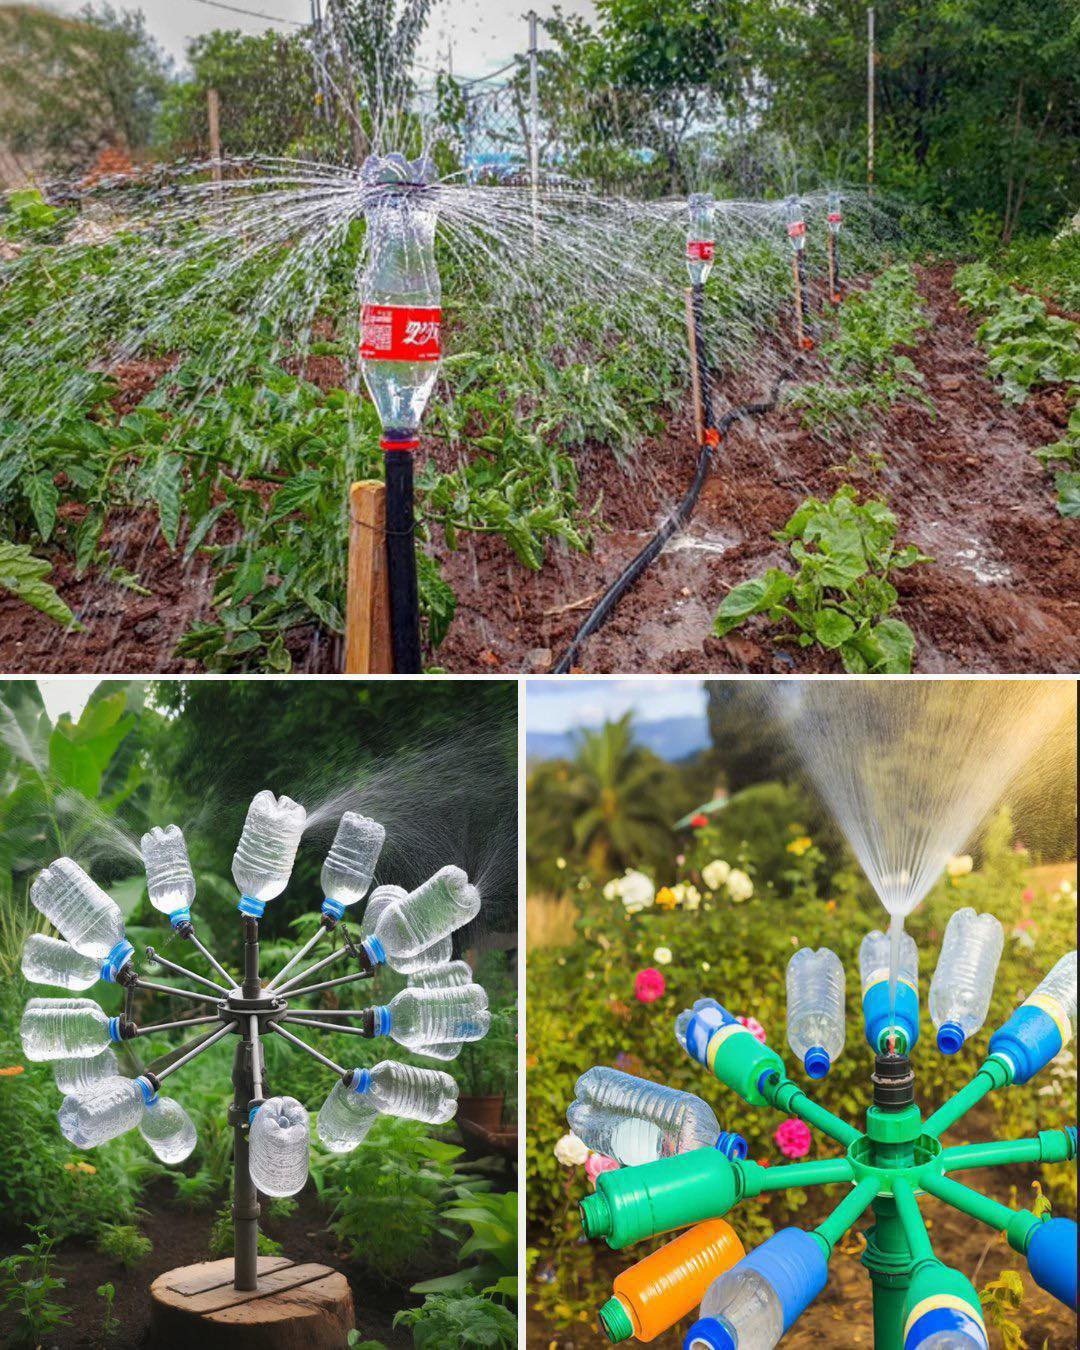
In areas where water scarcity is a significant concern, finding innovative ways to manage water use effectively is crucial. One practical and eco-friendly approach is to repurpose plastic bottles into a rotating irrigation system. This simple, cost-effective solution costs only about 10 cents per unit and makes use of readily available materials, making it accessible for gardens, farms, and other agricultural needs. Here’s how to set up this sustainable irrigation system step by step.

Materials Needed
- Plastic bottles (1- or 2-liter bottles are ideal)
- Scissors or a knife
- Hose or PVC pipe
- Drill or sharp object (such as a nail)
- Sand or gravel (optional)
- Tape (optional)
Step 1: Prepare the Plastic Bottles
Begin by collecting used plastic bottles of the same size. Remove any labels and clean the bottles thoroughly to ensure there is no residue that might contaminate your irrigation system. After washing, let the bottles dry completely before proceeding.
Step 2: Cut the Bottles
Using scissors or a knife, carefully cut off the bottom of each bottle. This will create a funnel-like shape, which is essential for allowing water to flow efficiently. Ensure that the cut edges are smooth and even to promote consistent water distribution.
Step 3: Create the Irrigation Base
Plan the layout for your irrigation system. Decide on the placement of the bottles based on the needs of your garden or field. If using a hose, connect it to a water source such as a faucet or rainwater tank. If opting for PVC pipes, ensure they are securely attached to your main water supply.
Step 4: Make Holes in the Bottles
Using a drill or sharp object like a nail, puncture several small holes around the sides of each bottle. These holes will release water evenly across the surrounding soil. To regulate water flow, ensure the holes are uniformly spaced and appropriately sized.
Step 5: Install the Bottles
Position the bottles upside down at the pre-marked locations in the ground. If the soil is loose, stabilize the bottles by partially filling them with sand or gravel. Alternatively, use tape to attach the bottles to stakes or supports for additional stability.
Step 6: Test the System
Turn on the water supply and observe how the system operates. Check the flow of water through the holes and adjust the water pressure to achieve even coverage. The bottles’ design and placement should facilitate a rotating motion, evenly dispersing water across a larger area. This will ensure optimal irrigation while minimizing water waste.
Step 7: Maintain and Monitor
To keep the system functioning effectively, regularly inspect it for clogs or damage. Remove debris that might block the holes and replace worn or broken bottles as needed. Monitor soil moisture levels to avoid overwatering or underwatering, and adjust the frequency and duration of irrigation based on plant requirements and weather conditions.
Why This System Works
This rotating irrigation system leverages the principles of sustainable design by reusing plastic bottles, reducing waste, and conserving water. The simple mechanism efficiently distributes water to plants, encouraging healthy growth even in regions with limited water resources. Additionally, this DIY approach is low-cost, easy to set up, and suitable for gardens of all sizes.
By turning discarded plastic bottles into valuable irrigation tools, this project not only helps address water scarcity but also contributes to reducing plastic waste. For just 10 cents per unit, you can create a system that benefits both your plants and the environment. So gather your materials, follow these easy steps, and transform your garden into a thriving, water-efficient oasis!


