Gardening enthusiasts are always on the lookout for innovative and sustainable ways to care for their plants while conserving resources and minimizing costs. In this article, we present two highly effective DIY watering techniques that utilize everyday household items. These methods are not only budget-friendly but also environmentally responsible, ensuring your plants receive adequate hydration with minimal waste.
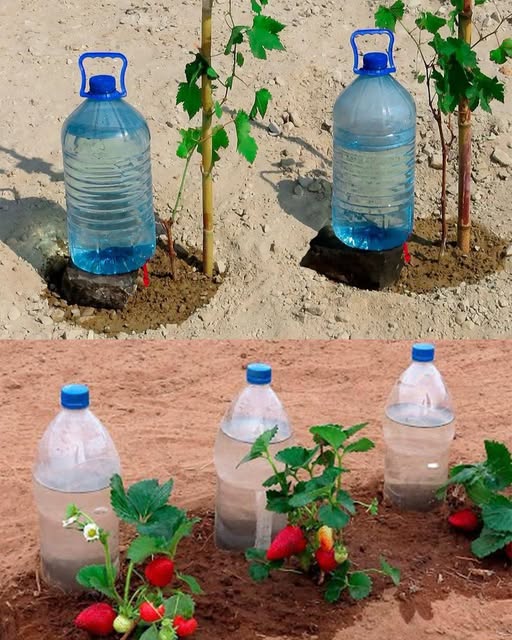
Method 1: Slow-Release Watering with a Buried Plastic Bottle
Materials Needed:
- A large plastic bottle (a 2-liter size works best)
- Marker
- Sharp tool (such as an awl or a heated iron rod)
- Water
Step-by-Step Guide:
- Prepare the Bottle: Clean the bottle thoroughly and remove any labels. Use a marker to draw two lines—one approximately 6 inches from the bottom and another about 4 inches from the neck.
- Create a Water Outlet: Using the sharp tool, carefully puncture a small hole about 3 inches from the bottom of the bottle.
- Fill the Bottle: Pour water into the bottle up to the lower marked line and screw the cap on tightly.
- Position the Bottle: Dig a hole near the plant and bury the bottle up to the marked line, ensuring the hole faces the plant’s roots.
- Final Step: Fill the bottle completely with water, secure the cap, and cover the surrounding area with soil, leaving only the neck of the bottle exposed.
Advantages:
- Provides consistent water delivery directly to the root zone.
- Reduces the need for frequent watering, saving time and water.
- Ideal for vegetable gardens and outdoor plants.
- Helps prevent overwatering and evaporation loss.
Method 2: Wicking System with a Plastic Bottle and Fabric/String
Materials Needed:
- A plastic bottle (any size suitable for your plant)
- A sharp knife or scissors
- Cotton fabric strips or thick string (such as shoelaces or cotton yarn)
- Water
Step-by-Step Guide:
- Prepare the Bottle: Cut the bottle in half using a sharp knife or scissors.
- Create the Wick: Thread the fabric strip or thick string through the bottle cap. Ensure at least half of the wick remains inside the bottle while the other half dangles outside.
- Assemble the Watering System:
- Flip the top half of the bottle upside down and insert it into the bottom half, forming a funnel.
- Fill the bottom section with water.
- Place the wick into the water, ensuring it remains submerged while the top section holds the soil and the plant.
- Final Step: Add soil and plant seedlings or existing plants in the upper section. The wick will gradually pull water from the reservoir below, keeping the soil moist.
Advantages:
- Provides continuous moisture for plants without overwatering.
- Ideal for indoor plants, small container gardens, and herbs.
- Requires minimal maintenance—simply refill the bottom container when water levels drop.
- Helps plants stay hydrated during hot weather or vacations.
Final Thoughts: A Simple Yet Effective Gardening Solution
These two methods offer sustainable, cost-effective solutions for keeping plants hydrated. They are particularly useful during dry spells or when you’re away from home. By repurposing plastic bottles and common household materials, these techniques support eco-friendly gardening practices, promoting both water conservation and efficiency.
Whether you manage a vegetable garden, potted plants, or a mix of both, these DIY watering solutions can help maintain lush, healthy plants with minimal effort. Embracing such simple, sustainable practices not only benefits your garden but also contributes positively to environmental conservation.